Placing an Image in Text Photoshop Tutorial
Placing an Image in Text
Here we have another simple yet awesome Photoshop tutorial for you, and this one is quite simply placing and image inside some text. It doesn’t sound much but after you go through these simple steps you will appreciate the final result. This tutorial is here to guide you through the process, but once comfortable and confident with it there is nothing stopping you using this for personal or professional use.
Step One – Getting Started
Firstly you want to get Photoshop open, that would be ideal and a great start, then and only then can the fun begin. After you have Photoshop open you want to place an image on the screen, as you can tell we have used this Sunny Palm Beach image that we got right here at High Resolution HD Wallpapers. This will now be your background and this image is the structure to this whole process.

Step Two – Duplicate
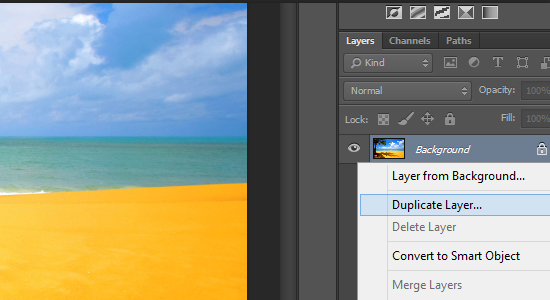
What we need to do now is something called duplicating the layer, and as it says all we will be doing in this step is essentially making an exact copy of the background we already have. To do this we simply need to Right Click on the background layer and select Duplicate Layer from the options given. Once this is done there will be another layer visible and generally it will be named Background Copy.
Step Three – Solid Fill & Moving Layers
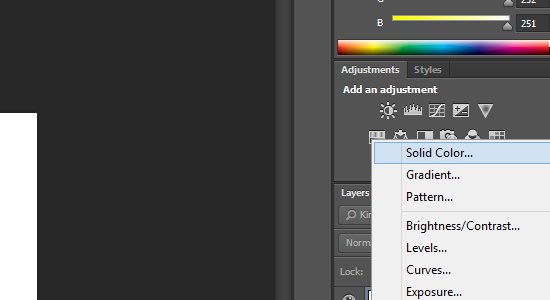
So now we have two identical layers this is where we get to finally see some visual changes. What we need to do now is select the Background Copy layer; this is done by simply clicking on it. Once selected locate the ‘Create New Fill or Adjustment Layer’ button which is at the bottom of the layers panel and is the fourth one in. This simply looks like a circle with half of it shaded out. Once selected choose the Solid Color option, this will then display a color picker. It is up to you what color you choose however we highly recommend white. After this is done you will notice the entire canvas is now white, don’t panic this is supposed to happen. Now you need to simply grab the Color Fill layer and drag it down so it ends up underneath the Background Copy layer.
Step Four – The Text Tool
Right now is the stage when we get to add some much needed text. To do this we need to select the Text tool, this is done by clicking the ‘T’ icon or simply hitting the letter ‘T’ on your keyboard, once done you’re ready to start typing. Once you’re ready it is advisable to choose a font of your preference we have gone for Poor Richard, but as for you, it’s your choice entirely. Once you’re happy with your font and size make sure for the color of the font to be white.
Step Five – Adding Your Text
Now is the time to add your text. As you can see we have opted for ‘Sunny Palm Beach’ and if you have used the same image we recommend you using that too. If you have used a different image then use an appropriate word to go with it. So now we have wrote our ‘Sunny Palm Beach’ on the background we need to make sure it is aligned properly. Note – This is down to personal choice. Once done simply click the tick sign at the top of the screen and you will now be out of editing mode. After all this is done remember to drag this layer beneath the Background Copy Layer.
Step Six – Clipping Mask
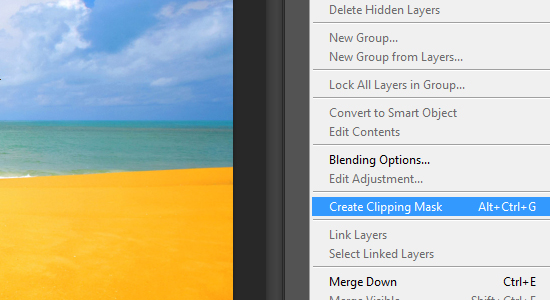
Now that we have the desired text in white on the desired background this is when we use another tool called the Clipping Mask tool. The Clipping Mask tool is located at the top right of the Layers panel. After selecting this tool you will need to choose Create Clipping Mask from the options. Once this is done you will notice a drastic difference, you now have the word but with the color from the background layer behind it. Clever Right?
Step Seven – Free Transform
Well we are almost nearing the end of this tutorial, just enough time for some final finishing touches and tidying up. Now that you have your great looking text with the background peering through you may want to use the Free Transform tool. To use this simply go to Edit > Free Transform or use the Ctrl T Shortcut. Once this has been selected you know have the freedom to move text, increase and decrease it and much more. Once happy select the tick at the top of the screen to exit and save the editing mode.
Step Eight – Drop Shadow
This is our final step, and this step really gives it that finishing touch and polishes it up nicely. What we need to do is with the Text Layer still selected click the Layer Styles option at the bottom of the Layers panel. This will be a small Fx symbol. Once selected you will need to select the Drop Shadow option from the given list, you will now be greeting by a window, and in this window there will be numbers you need to change. Opacity needs to be 50%, 120 for the Angle, 30 Pixels for Distance, 0% for Spread and then 40 Pixels for Size. Once that is done once again click ok or the tick box and that is it my friends we’re done and you have just made an amazing image.