Double Exposure
Double Exposure
In this tutorial you will be learning how to do a simple trick in photo manipulation called Double Exposure. What this is is having a background image that essentially hosts another image on it. An example of this could be a sheet of music as the background and the composer as the foreground.
Step One – Getting Started
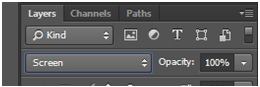
What you want to do first is open the photo you want to use as you background in Photoshop. This can be absolutely anything but we would recommend a landscape or cityscape image, many of which can be found here at High Resolution HD Wallpapers. After completing this task you will want to place the foreground image onto the background image by dragging and dropping the file onto your canvas. An alternate method for this can be simply File > Place. Now all is needed is for the blending mode of the layer to be set to Screen and then position your image. Once done click press Enter to apply the transformation


Step Two – Black & White
Now to make the final piece of the puzzle stand out more we first need to convert this image to black and white. To do this all you need to do is go into the Layers tab and select New Adjustment Layer, once this is selected select the Black & White option from the list. You can adjust these setting however you feel comfortable with and also remember you can delete this layer at any point and readjust the Black & White setting at a later point.
Step Three – Curves Adjustment Layer
As you can see at the moment this final result looks OK, but as I’m sure you agree OK is not enough and chances are you will want to do some tweaking. To do this we need to add a new Curves Adjustment Layer, and to do this we simply do the following; Layer > New Adjustment Layer > Curves. What this then enables you to do is make the girls face brighter or darker and allow you the opportunity to contrast it with your background. Remember to position the layer above your 2nd layer.
Step Four – Properties Panel
We now have the curves adjustment layer selected, which is a good thing don’t worry. Once selected you need to locate the properties panel, this is simply the Windows tab followed by Properties. Once this is selected you now have free reign to do what is you want simply by selecting the tool and dragging it up and down the graph to make the skin lighter and more visible and the hair darker thus blending in perfectly with the background. Remember you can also do this with the background layer in exactly the same way you done this foreground layer.

